Import SQL Azure database on local machine
At the moment I’m working on a (Orchard) project which is deployed to Windows Azure and uses a SQL Azure database. As my team needed to fix some issues which occurred in the Acceptance and Production environment, I wanted to get a recent database dump so we would be able to reproduce the issues on the development machines.
I couldn’t find an easy way to synchronize the databases or create a backup which I could restore. After doing some extensive searching I discovered there is a way you can restore a SQL Azure database to a local SQL Server 2012 environment.
To do this, you have to create an export in the Azure Management portal and import this export into your SQL Server 2012. I’ll describe the necessary steps below.
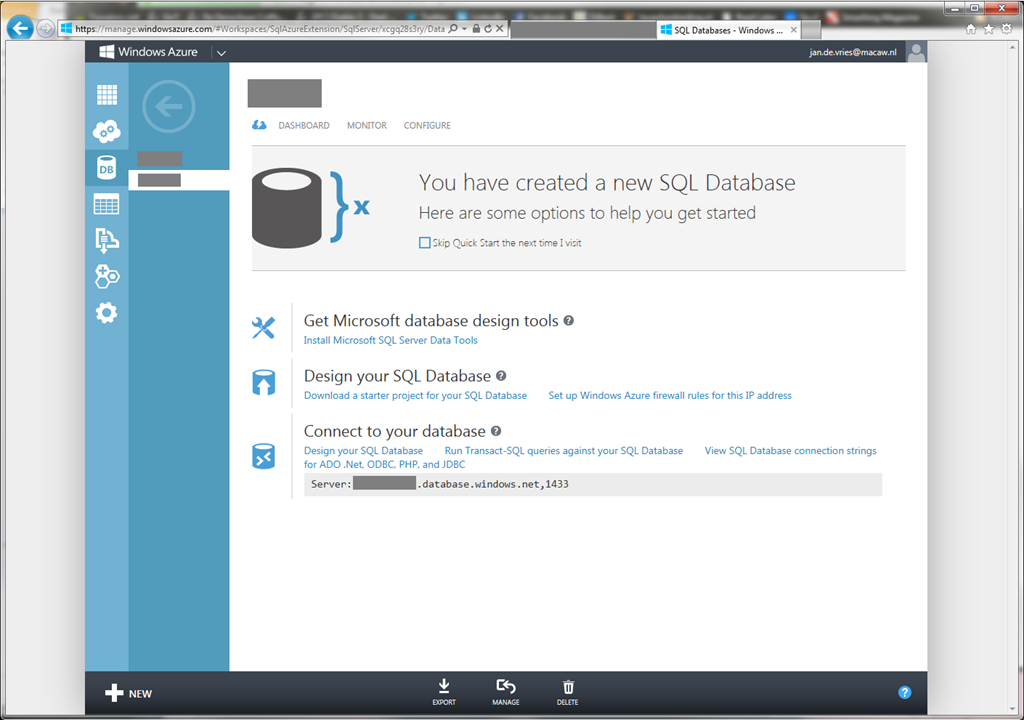
First, head to the Azure Management portal and go to the Database tab. On this screen you’ll see the option Export the database at the bottom of the screen.
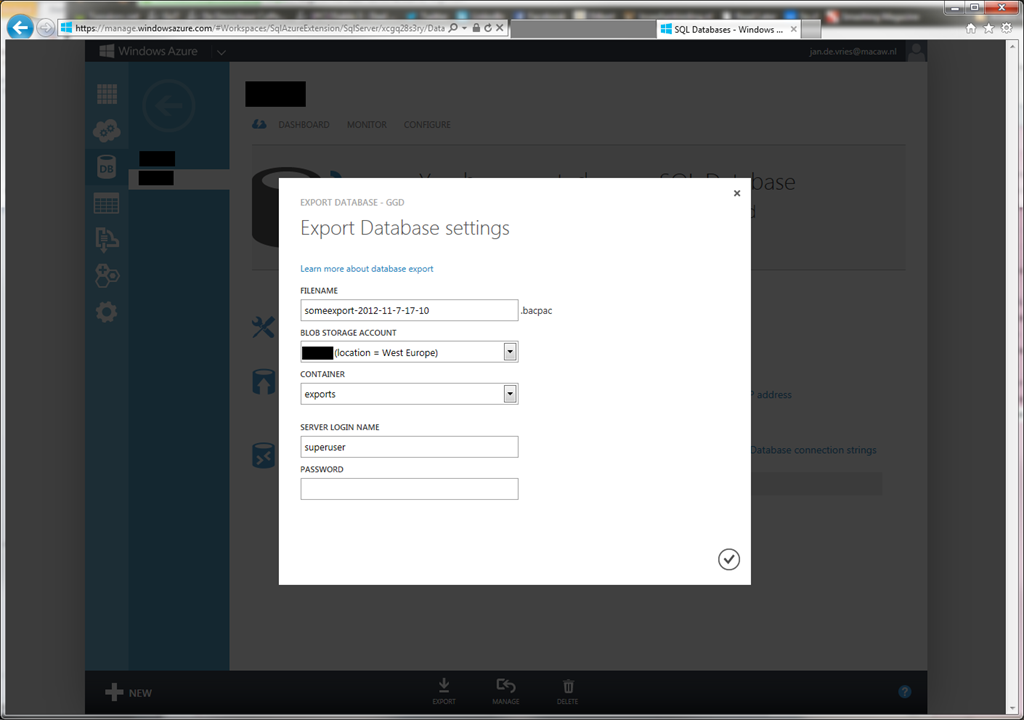
Clicking on this button pops up a modal dialog. In this dialog you need to specify the name of the export, a bacpac file, which storage account you’ll use, container to save the file and the login credentials of the database.
After you have finished creating the export you still need to download the file. At the moment it’s not possible do this (easilly) via the browser. To download files which are located in the blob storage you’ll need some extra software. I’ve used the free CloudBerry Windows Azure Explorer for this.
Once you have logged in to your blob storage account you can download the newly created bacpac-file.
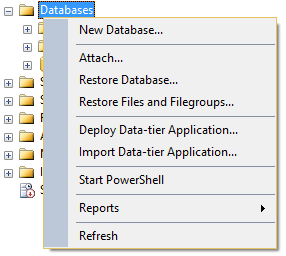
Now, start up your SQL Management Studio. When you right-click on the Databases-option you’ll see 2 new items, Deploy Data-tier Application and Import Data-tier Application. For importing a bacpac file you’ll have to click the second option, Import Data-tier Application.
You’ll be prompted with a friendly introduction screen explaining what this option does.

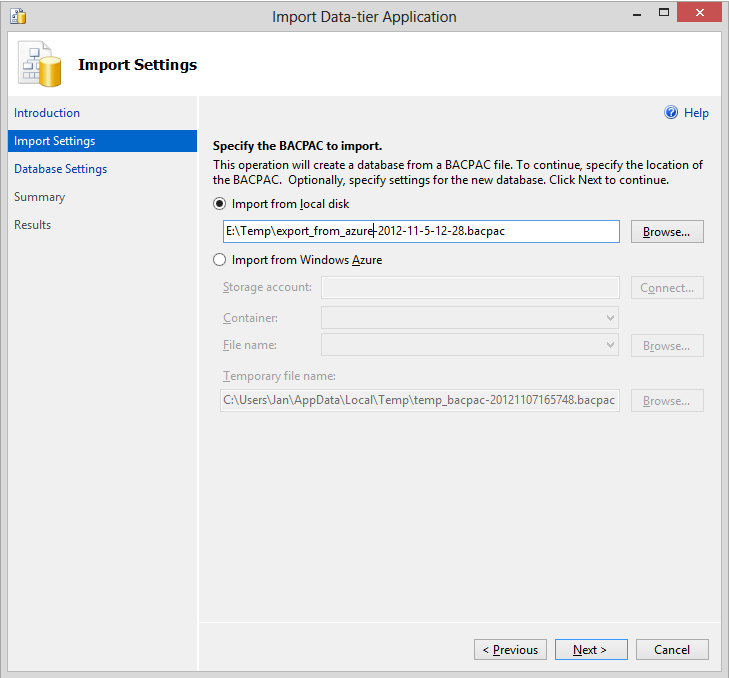
When you navigate to the second screen you’ll be prompted to select the bacpac file you want to import.
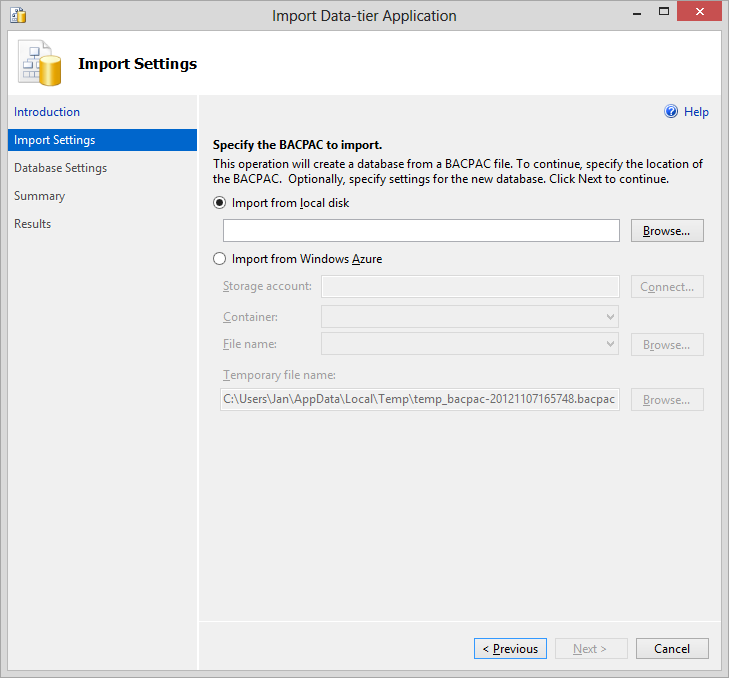
As you can see, you can also specify a storage account, container and filename on this page. This means you don’t have to download the bacpac file using some third party Azure Explorer. This is pretty convenient if you don’t want all that software on your system. For now I’ll use the downloaded bacpac file.
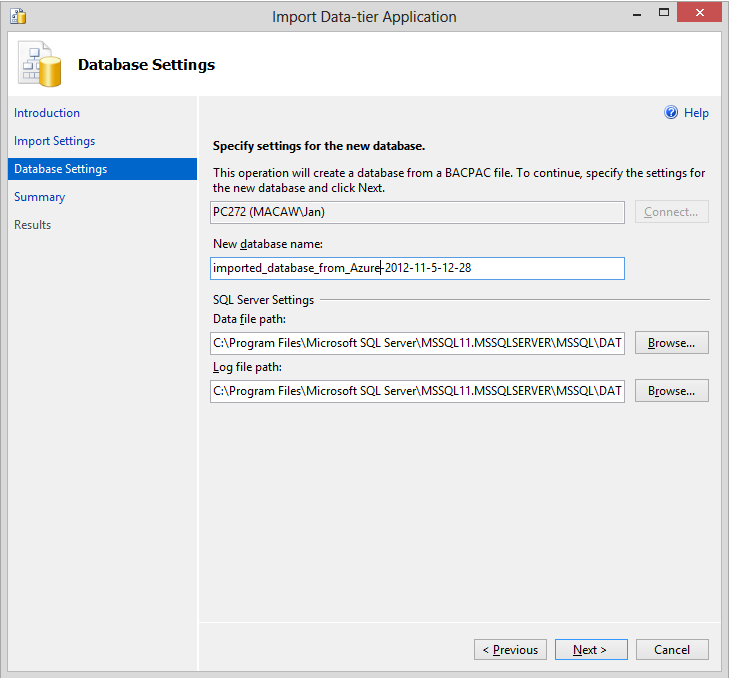
On the next screen you’ll be able to specify the database name and where the database files (mdf and ldf) need to be placed.
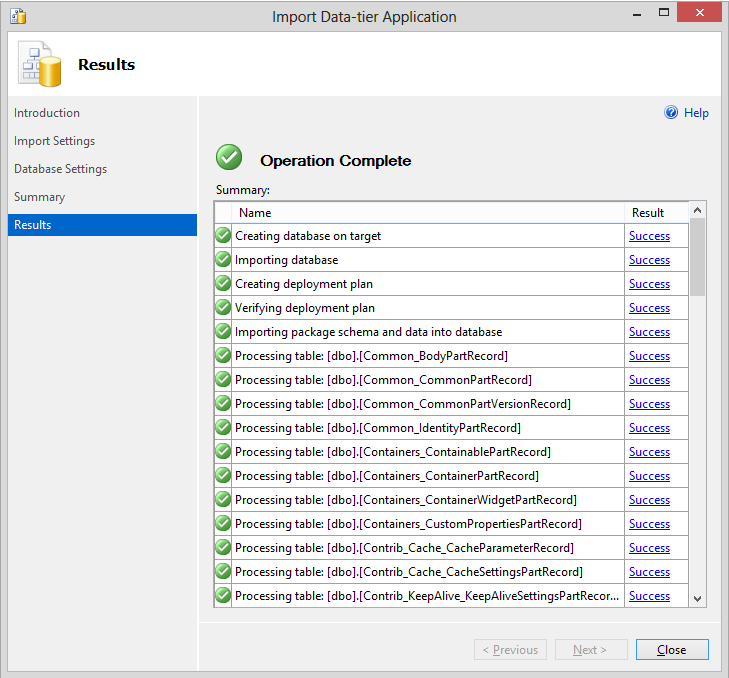
Finish the wizard and once it’s done you’ll see a nice summary of what has been created.
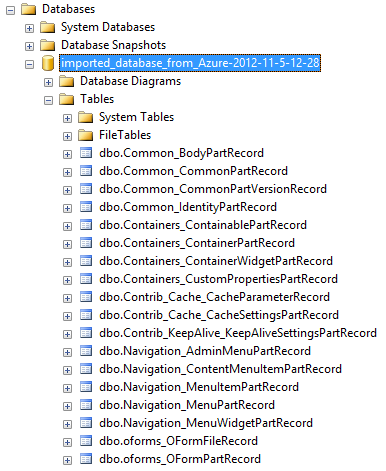
Refreshing the database node will show you the new database has been created also:
By following these steps you’ll be able to get database dumps from Azure into your own development environment. Please note this only works when you are using SQL Server 2012. Earlier versions don’t have this functionality and I doubt it will be added.
On a side note, I advice every developer to upgrade as soon as possible to SQL Server 2012. Restoring databases to earlier states has been made a lot easier. Now everyone can restore a database to a specific point in time. You don’t need to be a SQL guru anymore. So that and all the other improvements SQL Server 2012 brings, I can only say it’s a big step forward!